
- 603
- 4 229 229
Mark Lindsay CNC
United States
Приєднався 25 сер 2010
I'm just a guy in a shed, you know? A goofball with a bunch of benchtop power tools and an Avid CNC router. Although I'm known for making Vectric Software tutorials, I'm NOT a Vectric software or CNC expert.
Want to send me something? Please use this address:
Mark Lindsay
PO Box 581
Eagle Point, OR. 97524
We are a participant in the Amazon Services LLC Associates Program, an affiliate advertising program designed to provide a means for us to earn fees by linking to Amazon.com and affiliated sites.
We are also participants in the eBay Partner Network, an affiliate advertising network designed to provide a means for us to earn fees by linking to eBay.com and affiliated sites.
When you click on links to various merchants on this site and make a purchase, this can result in this channel earning a commission at no additional cost to you. Affiliate programs and affiliations include, but are not limited to, the eBay Partner Network and Amazon Services LLC Associates Program.
Avid CNC Rotary Axis – Assembly and Installation
Avid CNC Rotary Axis - Assembly and Installation
More down here ↓↓↓ Click MORE!
In this video, I’m documenting the assembly, installation, and alignment of an Avid CNC Rotary Axis for my Avid 4848 Pro CNC Router. I’ll first show you the assembly of the rotary axis. Then I’ll show you how I removed my old spoilboard, mounted the axis to my machine frame, then walk you through the process for aligning the axis with the machine frame step by step.
As usual, if you have any comments or questions about anything I covered in this video, please join me for the Live Q&A, or put ‘em in the comment section below.
On Sunday, May 19th, I’ll be hosting a LIVE Q&A session, where you can ask your questions pertaining to anything I’ve covered in this video. That Q&A starts at 3 pm Eastern time, Noon Pacific time. Hope to see you there!
Here’s a link to the Live Q&A: ua-cam.com/users/live3_kl0H5yus8
Link to my Avid CNC Rotary Axis playlist: ua-cam.com/play/PLLuYLaC3-QRMWon8Zq5LzgZWCYGG5WiaE.html
Link to Avid CNC Rotary Axis: www.avidcnc.com/avid-cnc-rotary-axis-p-724.html
Link to Lexivon 3/8 Drive Torque Wrench: amzn.to/3UFHYo6
Link to 24 x 36 inch Stainless Steel Work Table: amzn.to/3WQMXFn
For more info, or to configure an Avid CNC of your own, visit their website: www.avidcnc.com/
______________________________________________________________________________
If you’d like to support my channel and help with the making of future videos, please consider becoming a channel member. If you’d rather make a one-time donation, you can do that by using the following link:
PayPal: paypal.me/MarkLindsayCNC
Direct link to more information on becoming a Channel Member: ua-cam.com/channels/MrMqMabXS5_cFcq5K9Ob-w.htmljoin
Thank you very much!
______________________________________________________________________________
Link to the Vectric for the Absolute Beginner Playlist: ua-cam.com/play/PLLuYLaC3-QRNuVTej2P5emp1D4_Tm774p.html
Link to the 3D Modeling for the Absolute Beginner playlist: ua-cam.com/play/PLLuYLaC3-QRPb0jNAfuB-xOlAUHWl1wkC.html
Link to the V-Carving for the Absolute Beginner playlist: ua-cam.com/play/PLLuYLaC3-QROVf1Ua9BhGCzBty2FhZFmE.html
______________________________________________________________________________
Get your Official Mark Lindsay CNC T-shirts and coffee mugs here:
marklindsaycnc.com/index.php/product-category/logo-products/
marklindsaycnc.com is sponsored by Harneal Media - a website developing company that specializes in websites for the maker community. Find out more at:
harnealmedia.com/
______________________________________________________________________________
For more information on, or to download a free trial of Cut 2D, VCarve, or Aspire, visit the Vectric website at:
www.vectric.com/
For more info, or to configure an Avid CNC of your own, visit their website: www.avidcnc.com/
______________________________________________________________________________
Some links may be affiliate or sponsor links. Purchasing or even clicking through these links helps with the making of future videos.
I appreciate your support!
This video is for informational and entertainment purposes only.
#avidcnc #4848Pro #rotaryaxis
Переглядів: 1 775
Відео


Tiling Toolpaths Part 2 - Mounting and Cutting the Project
Переглядів 1,9 тис.2 місяці тому
Tiling Toolpaths Part 2 - Mounting and Cutting the Project

Building a Home Hobby CNC Shop/Shed - Part 11 - Lean-To Addition
Переглядів 2 тис.10 місяців тому
Building a Home Hobby CNC Shop/Shed - Part 11 - Lean-To Addition
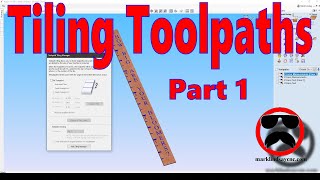
Tiling Toolpaths Part 1 - Design, Toolpath, and Save G-Code
Переглядів 7 тис.Рік тому
Tiling Toolpaths Part 1 - Design, Toolpath, and Save G-Code

Z Zero Position - Machine Bed AND Material Surface
Переглядів 3,4 тис.Рік тому
Z Zero Position - Machine Bed AND Material Surface

Z Zero Position - Machine Bed or Material Surface?
Переглядів 6 тис.Рік тому
Z Zero Position - Machine Bed or Material Surface?

Creating Two Fixture Offsets in Mach4
Переглядів 3,3 тис.Рік тому
Creating Two Fixture Offsets in Mach4

Repairing the Spoilboard on my @AvidCNC 4848 Pro CNC Router
Переглядів 2,8 тис.Рік тому
Repairing the Spoilboard on my @AvidCNC 4848 Pro CNC Router

Manually Setting X Y and Z Zero on my @AvidCNC 4848 Pro CNC Router
Переглядів 4,2 тис.Рік тому
Manually Setting X Y and Z Zero on my @AvidCNC 4848 Pro CNC Router
Adding a Second Touch Plate to my @AvidCNC 4848 Pro CNC Router
Переглядів 5 тис.Рік тому
Adding a Second Touch Plate to my @AvidCNC 4848 Pro CNC Router
Surfacing Materials Using a Toolpath on my Avid 4848 Pro CNC Router
Переглядів 4,3 тис.Рік тому
Surfacing Materials Using a Toolpath on my Avid 4848 Pro CNC Router
Surfacing Materials Manually on my Avid 4848 Pro CNC Router with Mach4
Переглядів 4,5 тис.Рік тому
Surfacing Materials Manually on my Avid 4848 Pro CNC Router with Mach4
Carving, Pouring, and Finishing the Multi-Color Epoxy Inlay
Переглядів 14 тис.Рік тому
Carving, Pouring, and Finishing the Multi-Color Epoxy Inlay
Introduction to Work Offsets and Fixture Offsets
Переглядів 11 тис.Рік тому
Introduction to Work Offsets and Fixture Offsets
Adding a T-Track Spoilboard to My Avid 4848 Pro CNC
Переглядів 8 тис.Рік тому
Adding a T-Track Spoilboard to My Avid 4848 Pro CNC
Leveling, Squaring, and Tramming My @AvidCNC 4848 Pro
Переглядів 10 тис.Рік тому
Leveling, Squaring, and Tramming My @AvidCNC 4848 Pro
Avid 4848 Pro Tabletop and Vertical Workholding Frame
Переглядів 4,5 тис.Рік тому
Avid 4848 Pro Tabletop and Vertical Workholding Frame
Avid 4848 Pro Assembly - Gantry, Rack and Pinion, and Electronics
Переглядів 5 тис.2 роки тому
Avid 4848 Pro Assembly - Gantry, Rack and Pinion, and Electronics
Avid 4848 Pro Assembly - Legs, Machine Frame, and Gantry Risers
Переглядів 6 тис.2 роки тому
Avid 4848 Pro Assembly - Legs, Machine Frame, and Gantry Risers
Import an STL File into VCarve and Aspire Version 11.0 and Newer
Переглядів 22 тис.2 роки тому
Import an STL File into VCarve and Aspire Version 11.0 and Newer
Channel Memberships go LIVE June 1st 2022!
Переглядів 1,5 тис.2 роки тому
Channel Memberships go LIVE June 1st 2022!
Add Custom Background and Add Texture Images to Vectric VCarve and Aspire
Переглядів 3,8 тис.2 роки тому
Add Custom Background and Add Texture Images to Vectric VCarve and Aspire
The CNC Process for the Absolute Beginner
Переглядів 13 тис.2 роки тому
The CNC Process for the Absolute Beginner
Toolpathing Layers for Multi-Color Epoxy Inlays
Переглядів 6 тис.2 роки тому
Toolpathing Layers for Multi-Color Epoxy Inlays
Cutout, Assembly, and Finishing - The Tea Shelf Project - Part 3
Переглядів 1,8 тис.2 роки тому
Cutout, Assembly, and Finishing - The Tea Shelf Project - Part 3
Using Sheets and Toolpathing Vectors - The Tea Shelf Project - Part 2
Переглядів 6 тис.2 роки тому
Using Sheets and Toolpathing Vectors - The Tea Shelf Project - Part 2
Importing Vectors from SketchUp - The Tea Shelf Project - Part 1
Переглядів 8 тис.2 роки тому
Importing Vectors from SketchUp - The Tea Shelf Project - Part 1
Overlapping Vectors for Multi Color Epoxy Inlays
Переглядів 8 тис.2 роки тому
Overlapping Vectors for Multi Color Epoxy Inlays
Thanks Mark, great video! Does it make sense to cut and pour all of the colors after clear layer before pouring the black? In other words, by cutting the other colors first, are you left with the black so it does not need to be cut in a tool path? I'm doing a multi-color epoxy project and the black in my design sees like it would be easier to not tool path the black because I would need to add closed vectors specifically for the black. Interested in your thoughts...Thanks Again!
This video was the last part of a 4-part series on doing this epoxy inlay. Here's a link to the playlist (you can skip the live streams if you'd like.) ua-cam.com/play/PLLuYLaC3-QRNkO3ZIYnEzTb32mn-_AE-J.html I explain all of my reasoning behind the order of the colors being poured in those videos. The short version is, pouring a color over black will mute that color. Sometimes make it so dark it's almost impossible to see. That's why I did the black last.
Thank you Mark. I did see (and learn) how to save the tool paths. Since you opened a new blank file to create the clock face, and now you have saved the tool paths to a jump drive do you also save the Vetric file? Maybe you show that in the next video.?? I still can’t believe how good your videos are. I feel like I’m in school learning - you are a very good teacher. I thank you for that!!!!
I didn't show it in the video, but yes - you do save the Vectric file as well. FYI. I'm in the process of recording new versions of this series, using the newer version of the software (V12.0) A lot of things have changed since I made this series 6 years ago, so I figured this was the perfect time for an update. The first video will be coming soon!
I am so EXCITED you are doing an updated training session. Also, thank you for you service!🇺🇸
Thank you! Part 1 of the new series goes public Sunday morning at 7 am Eastern.
I wish you would show how to save the toolpaths.
Proceed to Part 4. I cover it there. ua-cam.com/video/kFIkyl8tUFU/v-deo.html
Excellant tutorial
Oh, Mark. I watch so many CNC tutorials. You are the bomb. You and Garrett are my top picks. In this particular video, you LITERALLY addressed questions the moment they came to mind as I watched. Some have said you take to long. I think your style is perfect. So thorough, which helps anyone new to this journey. Thank you so very much, sir. I was trying to figure out how to mount a flat slab to a house with vinyl siding. 4 inch reveal, 7/16" step. Wanted the back of the sign to match the zig zag shape of the siding and sit flush. Thought about a fluting tool path. Long story short, you gave me a new path to machine this. Thanks!
Hi I have Aspire 4,5 , but don't have opion Toggle Top/botton side. Which number of Aspire hes such option?
I think 2-sided machining was introduced in Version 9 or 9.5, but I would encourage you to update to Version 12. There are so many other tools that have been added along the way, you're really working with stone age tech by sticking with V4.5.
Extremely informative! I’ve seen your name pop up on Garrett’s videos and Wednesday evening live streams. Subscribed
Thank you for being so thorough and speaking slowly and clearly. I will definitely be watching you.
Just the channel I was looking for. Thank you!
Anyone help me in cnc designing...can provide me designing data..files...plzzz help
Why not just take an orbital sander, then spray again with lacquer
It would take me ~ 20 min. on my lathe, but each one would be slightly different.
❤
Hi Mark, if one were to take a piece on and off the table to do epoxy pours would you need to set-up work offsets or can you just manually re-establish the xy coordinates? Thanks!
Strictly speaking, you can do this without work offsets. You just have to be very precise when you set your X, Y, and Z zero. The work offset just makes that process a lot easier. Once you've established the work offset and save it, you should be able to go back to that work offset repeatedly. The epoxy inlay of the cartoon pirate I did videos on is the perfect example. It was 15 colors, poured over the course of 6 days. I took the project off the table and poured the epoxy in my house, as it's climate controlled. Each day, I took the project back outside, homed my CNC, remounted the project, then went back to that work offset. I never set my X Y zero a single time. I only had to set my Z zero for each bit I used on that day's carve. The project came out perfect. Here's a link to the final video in that mini-series, in which I carved and poured the inlays, then surfaced and finished the project. ua-cam.com/video/u2A9L4b7VWU/v-deo.html Again - I never set my X Y zero a single time. I just homed the machine, went to that work offset, set my Z zero, then started carving.
@@MarkLindsayCNC Thanks Mark! I did watch all the videos in the pirate series, I'm new to CNCing and do not have the homing switches for my CNC. Thanks again! I have also watched a number of your other videos and for a beginner not familiar with all the terminology and concepts yet, you delivery style and and explanations are great and much appreciated
Thanks for the explanation. Learned a lot
Hi, every time I import a 3d Model in Rotary mode, it appears wrong, although the model itself looks ok. Am I doing something wrong? Please advise
Thank you Mark! This video just clarified my most intrepid task!!!
What if I only needed to make one copy of the toolpath? Is it possible to disable or suppress some copies from such an array?
Thanks Mark - that was a great video ! I'm new to Pro Carve so exploring the possibilites is exciting(even starting at 73 years old as I am. Your pace of explanation, detail, is much appreciated.
Mark, 250, 500 or more shows to go, I’m hanging with ya brother. Congrats on this awesome milestone.
Steve here. Hope you are doing fine
I am a beginner and you put me in check and also eased my mine. Thank you for this list. I am my own worst enemy in the begining journey.Thank you!!!
I am glad she won.
You look a lot younger.
good episode, Mark
I'm importing a STL, its making me set a zero plan. If i go above the zero plane my model is out side the work area. If i set the zero plan in the middle, there is some parts that are under the zero plan that wont be cut. How do I fix this issue?
You have almost perfect timing. I'm going to discuss this very thing on my Live Q&A on Sunday, July 7th at Noon Pacific time, 3pm Eastern time. I hope you can join us, as I'm going to answer your question directly. It's a common question, but it's way too much to try to type out in text.
@@MarkLindsayCNC yes I will have to sit in. Thanks
Your training is absolutely first-rate. After I found this series, I started with the first video and I plan on working my way through the series. I am new to CNC and at this point, I don't know what I don't know. This series is filling in those knowledge gaps in a logical sequence.
Thank you, sir. Do we need home setting for A axis?
My first rotary axis had no home position, so strictly speaking, it's not needed.
@@MarkLindsayCNC Thank you so much for this tutorial.
Great video Mark !
If your wife is anything like my wife, scruffiness is not considered a desirable trait -- after about a month, she's "suggesting" I get a hair cut & trim. ( Usually takes another month or two before it happens.) 😬
Thanks Mark for a very informative lesson, I am thinking of buying a Rapid Change ATC and they sent me a STL file so that I can run a mock up unit to see if it will fit on my CNC. Well it has holes in it for where the cutters fit into and fixing holes to the cnc table, I have never done a 3D before but this one made it a lot easier to understand. I have just upgraded to VCarve12 so working out what is different is a bit of a challenge. Cheers.
Having a CNC machine without teaching content like this would be hard. It's great to get insights from a professional!!!
Thank you very much for your kind words, but I'm far from a professional. I'm just a retired guy in a shed who is having the time of his life. If this mini-series of videos has helped you with a 2-sided project, then I've done my job. Thank you!
Setting up my first two-sided carve. This was invaluable, and very clear. Thanks!
That is sooooo cool! I can pretty much make any type of moulding. After renovating my first floor, the moulding where it tied into old type, I was told they don’t make it anymore. Now I can recreate it once I get all the measurements. You were right, not talked about much.
This is a great video. I've run into a lot of issues with ruining sanding disks with melted shellac and paint, so that's a great tip.
I have watched this video several times and I have had that got you moment, thankyou very much for all you do to help c.n.c. users...
Thank you sharing and giving me tips to consider.
By chance, I just received my 4th axis from Avid earlier in the week. This video goes a long way in removing some anxiety and dread about setting things up. I should get a torque wrench. What is the torque suggested for extrusion? You are an easy-to-listen-to teacher and your videos are clean and void of fluff - a testament to your editing.
I do appreciate your kind words, but I think my editing needs a lot of work. Just my opinion, but thank you again. I'd say 99.999% of people don't bother with a torque wrench. They just snug it up and move on. Avid themselves suggest that. I spent too much time in the army working on helicopters to not have at least a suggested torque value, but that's just me. I spoke with the folks at 8020, and they recommend a torque of 15-18 ft lbs., but DO NOT go past 20 ft lbs. Basically, if you tighten it until it's tight, you'll be fine.
Awesome video. like to see it done in CNC. Thanks
Flip that bowed wood and put it out in the sun. Bow down. It will come back. But watch it will reverse. Old woodworker Charles Neil taught me that it works. Bag it when its flat.
Want to see rotary action
Rotary can’t wait. I’m just about to buy one as well, but mine will be from China greetings from Australia.
how do you set z for lettering inside a dish?
Assuming the dish is a 3D model you're carving before you carve the text, you set the Z zero to the material surface the same as you would if you were carving into the surface of the material. In the V-Carve Engraving toolpath, check the box next to Project onto 3D Model when you calculate that toolpath. The software will do the rest.
Is each side of the project considered separate files ?